
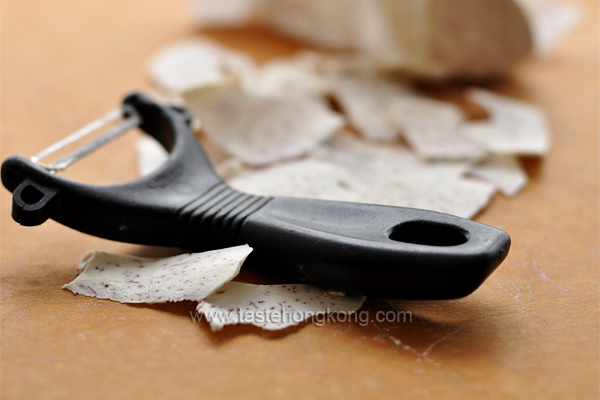
Helping me to slice a chunk of taro into these papery thin slides is an old friend of mine. It is not a food processor nor is it a mandolin slicer. It is my hand-held peeler, silently responding to my repeated requests for close to ten years, I believe.
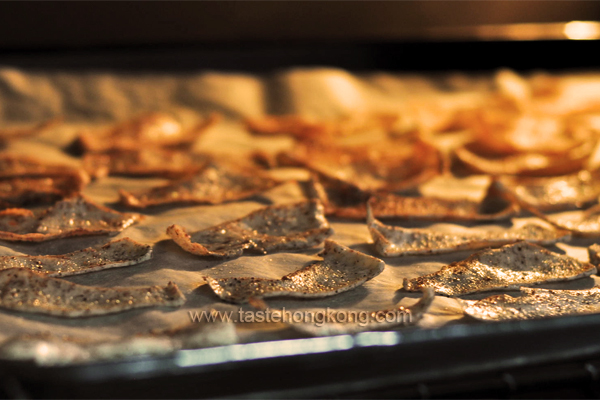
The taro slices came out from the peeler on average were barely one mini-meter thick despite that some are thinner or thicker. When baked (or roasted) in my counter-top oven, they turned golden, crisp and aromatic in less than ten minutes.
To cope with the irregularities I created, I grouped the taro slices of similar sizes and thickness in one tray for roasting (this would help avoid scorching the thinnest or under-cooking the thickest).
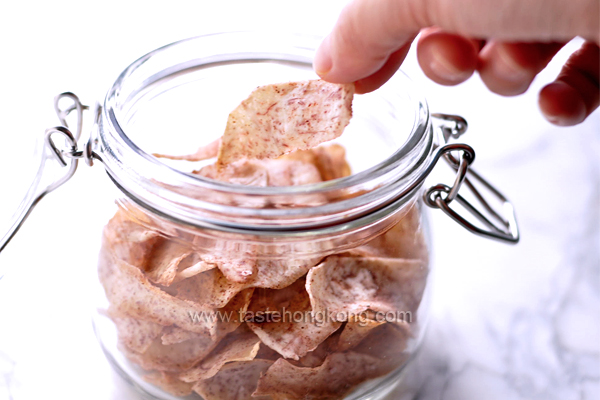
With the five-spice powder, these taro chips demonstrate the character of an Asian snack. Yet having had the many merits of roasted foods – crunch and flavorful, they are as addictive as snacking on potato chips. But eating too much roasted chips would make our bodies feel heaty (sympton like sore throat). Good news is, we do not need to finish all of these immediately after cooked. In an air-tight container, they can be kept in good shape for up to a week.
- Ingredients
- quarter of a big taro, ~ 250g
- 3/4 tsp salt
- 1 tsp Chinese five-spice powder
- 1 tbsp cooking oil
Method
Peel the hard brown skin off from taro (knife is better than peeler for this). Wash clean and pat dry.
With a peeler, make slices as if you were peeling off very thin skins, no more than 1 mm thick and resembling the size of a potato chip if possible.
Season taro slices with salt and five-spice powder. Then coat them with oil. Rest for about 10 minutes.
Meanwhile, preheat oven with broil (roast) function to 100 degree C.
Line baking tray with a parchment paper and spread oiled taro slices on it in one layer until full. Repeat the same for the remaining taro slices.
Roast until upward facing sides turn slightly brown (the edges will curl up as well), about 3 to 5 minutes. Flip the chips over and continue to broil the other side for another 3 minutes or till done. If any taro slices brown first, just remove them while continue roasting others.
Sprinkle more salt to taste. Cool the chips on rack before eating. Enjoy!
Note:
If you are buying one whole taro, it is best to divide it into four sections lengthwise, making each more manageable for slicing by the peeler.
Uncooked taro can cause itchy skin, so wear hand gloves when peeling.
For the remaining knobbly or remaining chunk of taro, you may simply cook it in another dish.
- Category: Vegetable .
- 18 comments
To get immediate updates and new recipes from my blog, you may also SUBSCRIBE them via RSS feeds. See you there.




Thin like paper and you didn’t even leave the job to the mandolin … Amazing!
Bet they are very crunchy!
@Angie@Angiesrecipes,
My mandolin makes thicker slices : (. And these from the peeler are thin enough for roasting into crunchy chips.
My gosh..these look so good I don’t think it can last a day in my house…haha. Sad that I can’t find fresh taro here….only frozen ones. Maybe I can try with other root vegetables. Would be fun to peel with the peeler I think 😀
I like using my peeler (similar to yours) to create vegetable/root vegetable “thins” , and shaved ribbons too 🙂
I like this… taro chips and no FRYING 😀
btw… I tried making your dorayaki… it was fantastic. Kids loved it 😀
@Mary Moh,
That saves you a container then : ). I bet you have already got ideas on making variations, have fun!
@tigerfish,
Yes, it helps too, but sometimes I break the ribbons : ).
Lisa H,
Fantastic!
These look beautiful!! I’m a huge fan of taro, so I’d definitely love these 😉
I sometimes buy packaged taro chips and they are incredibly addictive, but they’re fried (and quite oily!) and thick and chunky so quite different to these. I’ll definitely have to try these one day- such a shame that mum already cooked the taro we had in fridge today! I think they’re a little expensive right now though *sigh*
@Von,
Thanks!
Yes, this is less oily than deep fried. For better crunchiness, I love coating each piece with enough oil. Hope you shall enjoy yours soon!
WOW! This looks pretty and yummy. I’m sure my family will loves if I make this for them.
Thanks for sharing 🙂
@Anncoo,
Sure, hope your family, including you, loves the taro chips.
Enjoy!
this sounds awesome, i dont think i need a week to finish these! always great ideas from you!
@lena,
Thanks! Yes, it could be finished up really fast if not concerned about the heaty symptom.
Oh my, these taro chips sounded fabulous. I don’t having them everyday.
Thanks for sharing it.
Goodnight,
Kristy
@kristy,
You are welcome!
Oh! I love taro, but never made these chips…I’ll definitely give this a try…love how you used the peeler 🙂
Hope you have a great weekend and thanks for sharing such a yummie recipe!
oh Yum! I love the simplicity of these chips
Love taro! This is such a great way to snack!
[…] only problem that I find is that the chips were too salty and oily. So after seeing the recipe from Taste Hong Kong I decided to make some roasted taro chips myself. Well, I was lazy and I did not use the hand held […]